Karoll.industries
Project work and updates

Project work and updates

I travel a lot for work. Sometimes, I miss PC gaming. To solve this, I decided to build my own custom wireless RF minimal keyboard.
When coming into this project, I already had some understanding of the requirements for this keyboard. This keyboard needs to be decently portable and light, and I want to keep it functional enough to play games on — no membrane keyboards here. However, I can't just cut off half the keys. This keyboard will, also, be used for work.
Eventually, I came up with this design.

The design will consist of a 'main' (or 'master') keyboard, which will contain the keys I use most often, and an 'auxilary' (or 'slave') keyboard, which will contain the rest of the keys. The two keyboards will be connected magnetically. If I need a full keyboard (or numpad) for work, I can snap-in the module onto the master keyboard. If I just want to play games, I can only take the main keyboard with me.
The keyboards will be connected with magentic pogo pin connectors. This design will allow me to save on battery life in comparison to the traditional split keyboard design. This is because the slave module will not need it's own RF/wireless capabilities, or its own battery, and will use a weaker MCU. Also, it'll be more convenient to have to charge only one keyboard — instead of two. The slave module will get it's power from the master module.
First up, I wanted to see what keys I use most often when gaming. I want to make my backpack as light as humanly possible, so I used a keylogger to track my key usage over a few sessions of gaming. The ones I used the most could be added to the 'main' or 'master' custom keyboard, and the ones I used less often could be left out.
Here's the code:
import os, csv
from pynput import keyboard

class keylogger:
    def __init__(self, data_output_path_relative):
        self.data_output_path : str = data_output_path_relative
        self.filename : str = None
        self.key_counter : dict[str: int] = {}
        self.previously_pressed_key : str = None

    def start(self):

        self.filename = "logger.csv"
        files = os.listdir(self.data_output_path)
        if not self.filename in files:
            # write initial csv header
            with open(os.path.join(self.data_output_path, self.filename), mode='w', newline='') as file:
                writer = csv.writer(file)
                writer.writerow(["key", "counter"])
        else:
            # load existing key counter data
            self.read_data()

        #start logger
        with keyboard.Listener(on_press=self.on_press) as listener:
            listener.join()

    def read_data(self):
        with open(os.path.join(self.data_output_path, self.filename), mode='r') as file:
            reader = csv.reader(file)
            next(reader)  # Skip header
            for row in reader:
                key, counter = row
                self.key_counter[key] = int(counter)

    def write_data(self):
        with open(os.path.join(self.data_output_path, self.filename), mode='w', newline='') as file:
            writer = csv.writer(file)
            writer.writerow(["key", "counter"])
            for key, counter in self.key_counter.items():
                writer.writerow([key, counter])

    def decode_ctrl_char(self, c):
        if isinstance(c, str) and c.startswith(r"\x") and len(c) == 4:
            try:
                value = int(c[2:], 16)  # hex part after \x
                if 1 <= value <= 26:
                    return f"ctrl_l+{chr(value + 96)}"
                return f"ctrl_l+{value}"
            except ValueError:
                pass
        return c
    def on_press(self, key):
        # get the key name
        key_name = []
        try:
            if(str(key).startswith("Key.")):
                raise AttributeError
            key_name.append(str(key)[1:-1])
        except AttributeError:
            key_name.append(str(key.name))

        if r"\x" in key_name[0]:
            key_to_decode = key_name[0]
            key_name=[]
            key_combo = self.decode_ctrl_char(key_to_decode)
            keys = key_combo.split("+")
            if self.previously_pressed_key == "ctrl_l":
                key_name.append(keys[1])
            else:
                key_name.append(keys[0])
                key_name.append(keys[1])
        for k in key_name:
            k = k.lower()
            if (k != self.previously_pressed_key):
                self.previously_pressed_key = k
                print(f"Key pressed: {k}")

            self.read_data()

            if k in self.key_counter:
                self.key_counter[k] += 1
            else:
                self.key_counter[k] = 1

            self.write_data()


if __name__ == "__main__":
    kl = keylogger(data_output_path_relative="data")
    kl.start()
To process the data into a visual format that I could easily understand, I used the Python library Pillow to create a heatmap diagram.
The diagram is comprised of three layered images. The bottom image contains the key boxes, the middle image contains the drawn heatmap, and the top images contains the key labels.
You can download the code and mask images here:
Download Project ZIPFinally, I was left with this heatmap diagram:
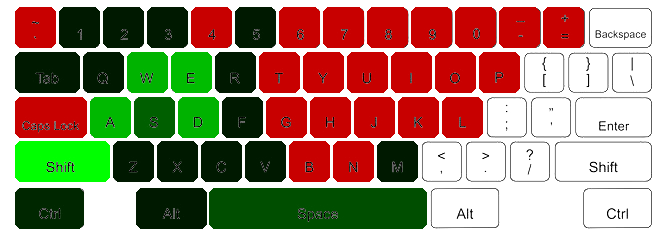
The greener the key, the more I used it. As you can see, the keys I use the most are W, A, S, D, Q, E, Z, X CTRL, SHIFT, and SPACE
This gave me a rough idea of what keys I want to keep. Some less used keys I still kept — like ALT, ESC, numbers 1 through 5, and M.
They way the keys are spaced on the keyboard is a bit weird. Some keys are longer, some are offset from the grid. Weird.
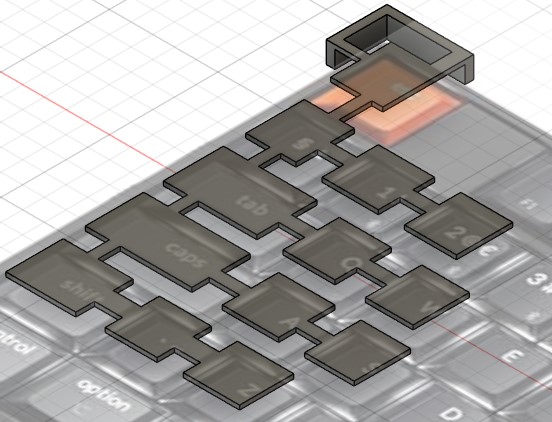
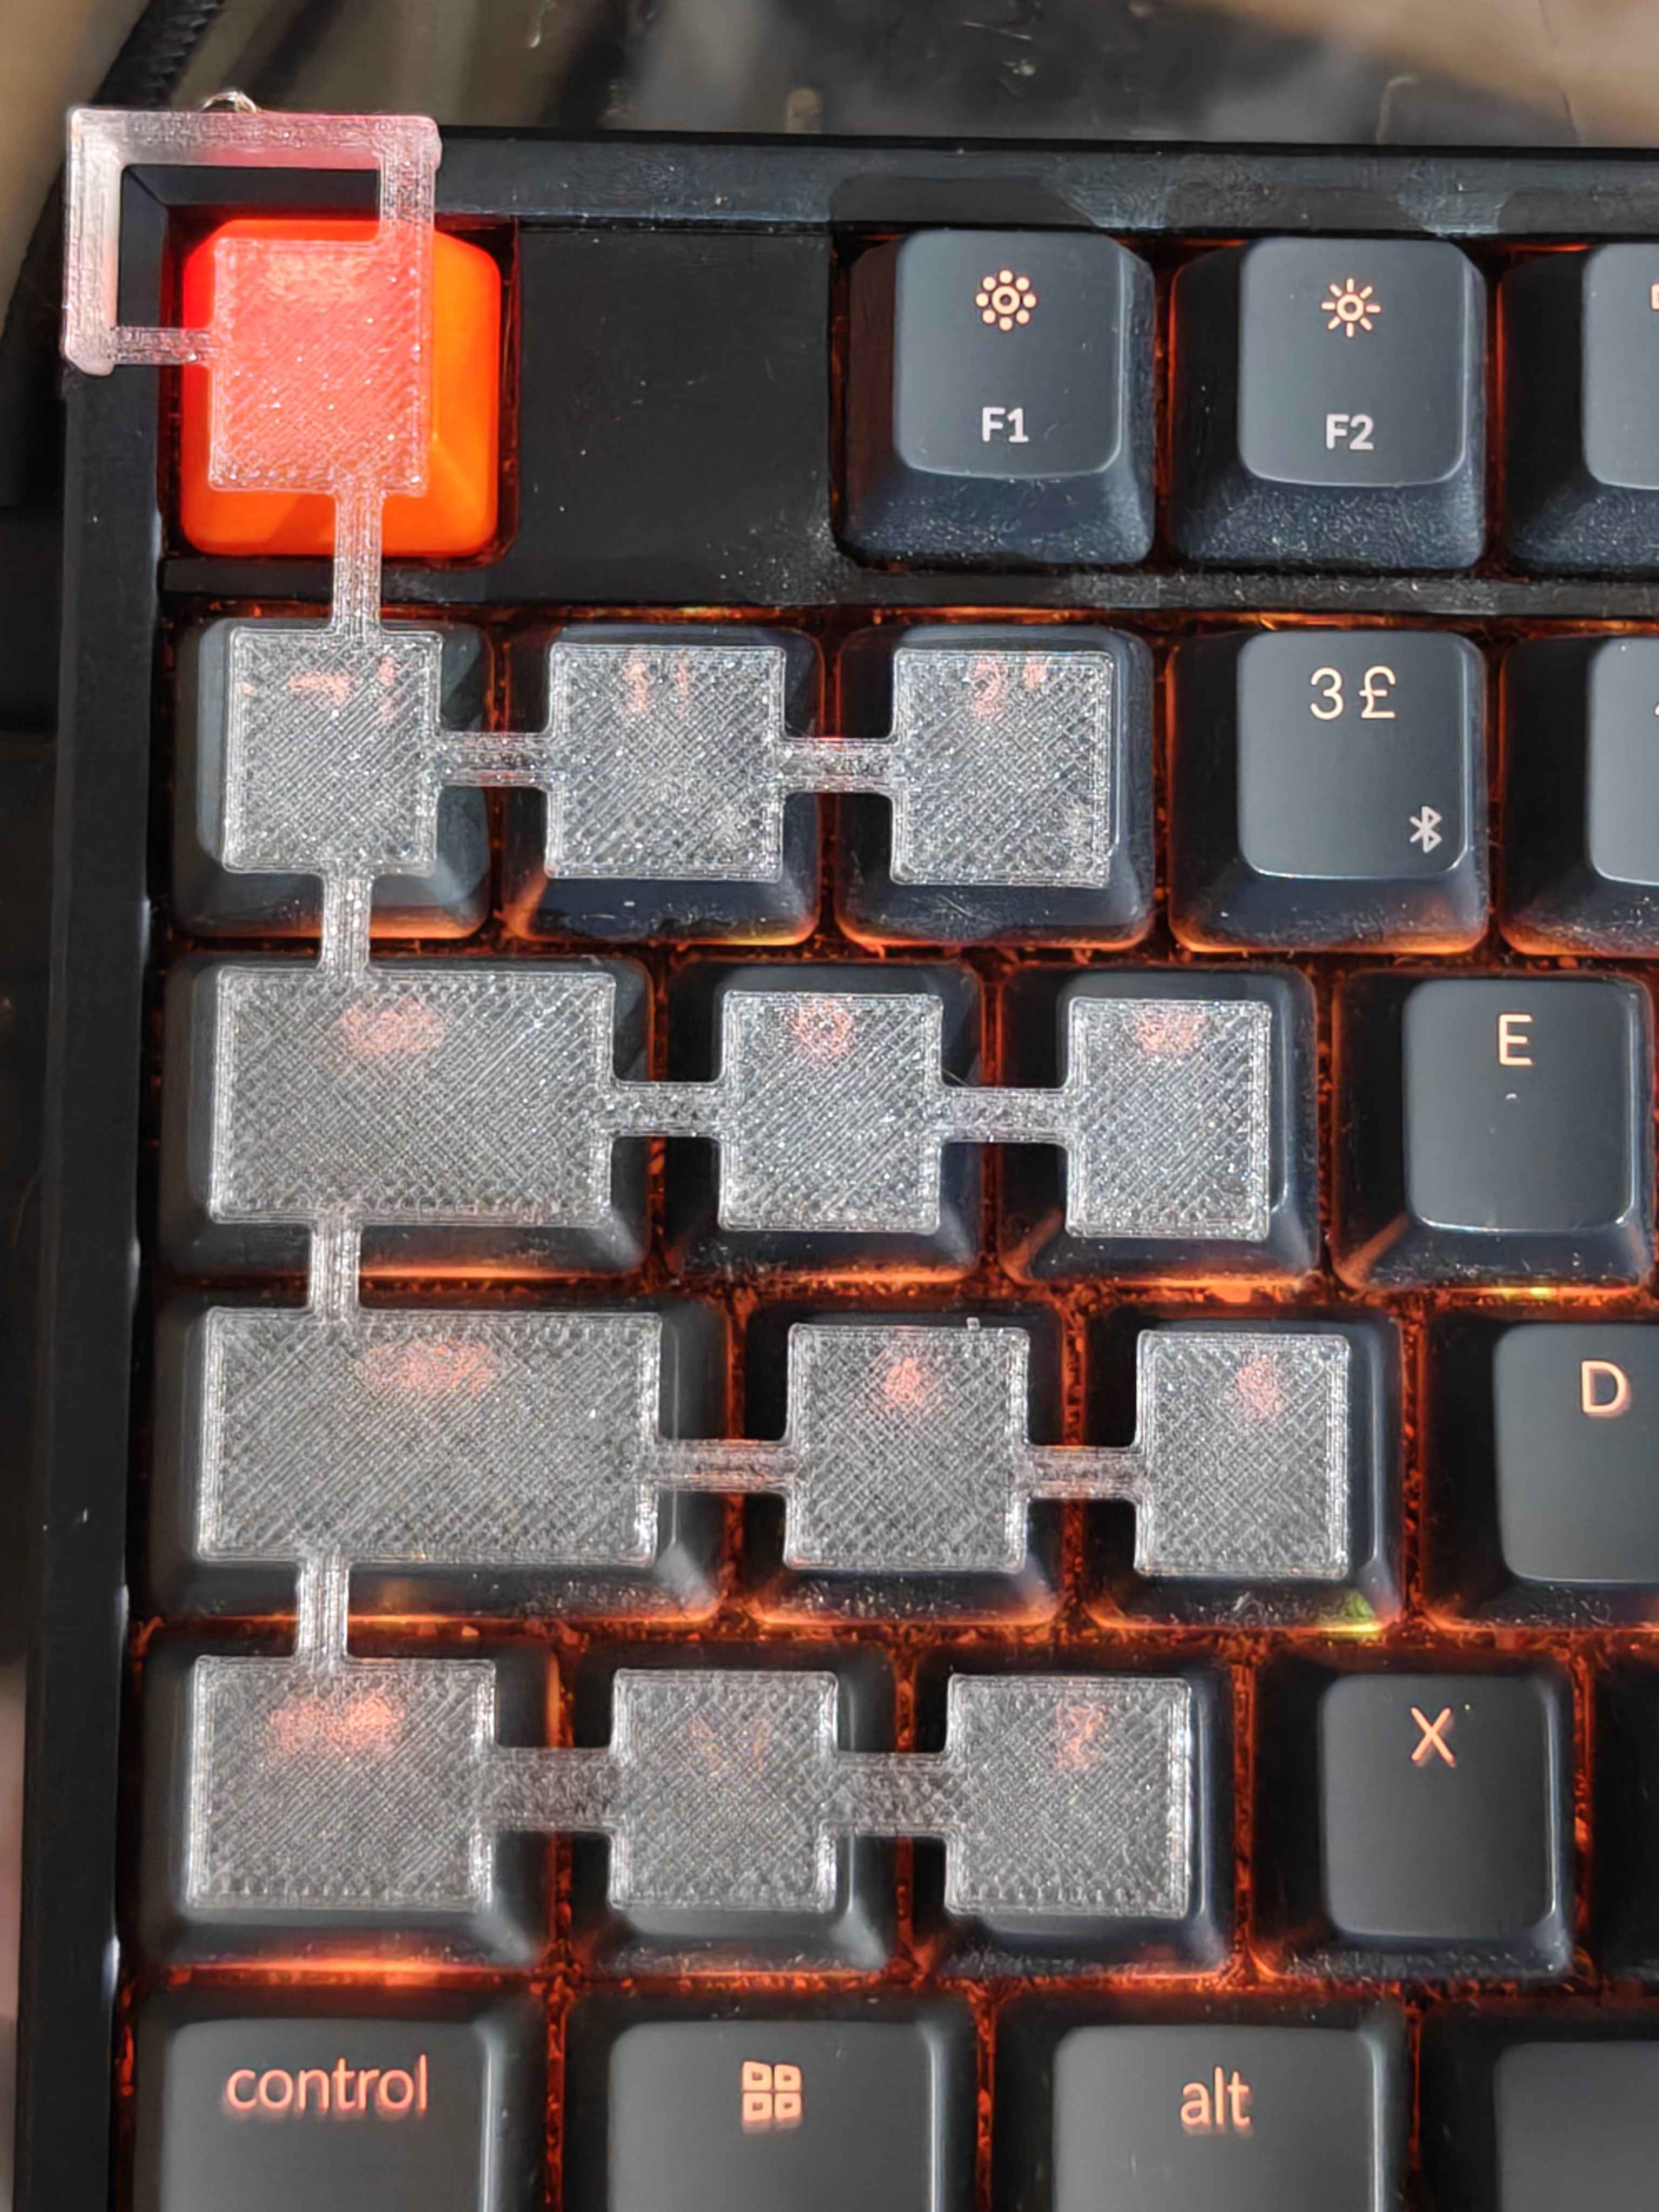
To get a better idea of the key spacing, I imported a flat image of the keyboard I own. With some callipers and measurements, I scaled the image to the correct size. Once I had this, I created a rough 3D design of a guide. If the keys, roughly, matched up to the guide, then I knew I was on the right track.
The result was a 3D design of the keyboard layout. Good starting point to work from.